Yoga positions that involve external hip rotation can be extremely healthy for you. With regular practice, you can reap innumerable benefits, such as increased flexibility, reduced pain, and improved range of motion. Adding these yoga poses to your current routine will help you reach an ideal state of health and wellness. If you are wondering what these poses essentially are and what are some of the best poses you must do, wonder no more! This article will review everything you need to know about external hip rotation yoga postures.
What are the External Hip Rotation Poses?
Let’s address the fundamentals first because having clarity on the concept will help you grasp the poses better. So, what is external hip rotation?
It is a movement where your legs rotate outward from the hip socket. This action can also be performed while standing, lying down, or sitting. When you rotate your hips outward, it not only stretches the muscles and tendons around the hip joint but also helps to enhance your flexibility and movement.
These yoga poses help stretch and strengthens the muscles around your hips. Moreover, these postures can also assist with pain relief in your hips.
Now that we have a clear understanding of what these poses are and what they do let’s explore some solid yoga poses in this category.
Best External Hip Rotation Poses to Practice
There are many different external hip rotation yoga poses that you can practice. In this section, we will discuss some of the best yoga poses for external hip rotation with steps to perform them correctly. These poses covered here range from beginner to advanced, so you can find the perfect pose for your level.
Warrior II Pose
The Warrior II pose is a great beginner-level pose for external hip rotation. This pose helps to stretch the muscles in your hips, thighs, and chest while strengthening your legs, ankles, and back.
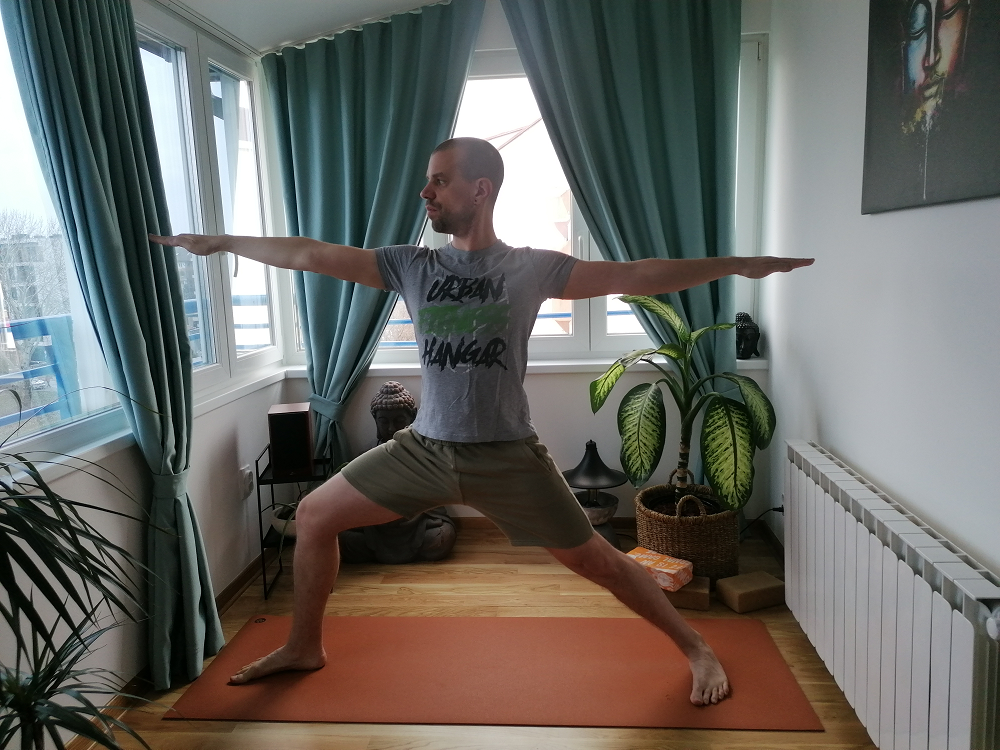
Warrior 2 Pose
Look over your right hand while keeping your arms at your sides and parallel to the ground. After maintaining the position for 30 to 60 seconds, repeat the exact steps on the opposite side.
Garland Pose (Malasana)
Another classic external hip rotation yoga pose you can try is the Garland Pose. It’s an excellent pose to give a good stretch to the muscles in your hips and thighs. Regular practice of the Malasana potentially enhances your balance and coordination.

Malasana Pose
Half Pigeon Pose (Ardha Kapotasana)
The half pigeon pose is an excellent yoga to release tightness in the hips and thighs. Practicing this pose enhances your range of motion and flexibility. Plus, it’s a beginner-level pose, so it’ll be easy for you to stretch your leg into it.
Start with the downward-facing dog pose. Your right knee should be brought forward and set down near your right wrist. Next, extend your left leg behind you while bringing your hips to the ground. If you feel comfortable in the position, you can walk your hands forward and place them on the ground in front of you. Maintain your posture for half a minute and repeat switching the side.
Koel Pose (Kokilasana)
The Koel Pose is an intermediate-level external hip rotation yoga pose. This sitting yoga involves a forward stretch which helps to open the hips and groin area. The Koel Pose is also known to help relieve stress and anxiety.
The procedure is like this: Sit in padmasana, hold the big toes with respective hands and bend forward. Take the support of your elbows and look forward. Inhale deeply and hold this position for a few breaths. Release the pose by sitting back in padmasana.
Fire Log Pose (Agnistambhasana)
Another brilliant addition to our external hip rotation yoga poses list is the Fire Log Pose. The name suggests that this posture appears to be two logs placed on top of each other. It is a great pose for beginners as it helps to open the hips and groin area while also stretching the muscles in the legs and back.
fire log pose
Gate Pose (Parighasana)
This beginner-level yoga helps to open the hips and stretches the muscles in the legs and back. The Gate Pose is also known to improve your digestion and relieve stress. The asana gets its name from the appearance resembling a lack or lock.
To perform the Gate pose, start in a kneeling position and feet at hip distance. Take a deep breath and stretch your left leg out to the side. Exhale and extend your right hand, rotating so the palm faces upwards. Slide your left hand, reaching the fingers towards the toes but do not force the stretch. Slowly rotate your chest towards the ceiling and gaze towards the lifted right hand. Hold the position for a few long breaths, then switch to the opposite side.
Conclusion
These are just a few of the external hip rotation yoga poses you can try to improve your flexibility and range of motion. In the article, we only covered beginner and intermediate-level poses. You may start by performing these basic postures. Once you’ve mastered them, you can proceed to the more difficult ones. Remember to warm up before you start and to listen to your body when you’re doing the yoga poses. There’s no need to strain your body; if you are feeling any discomfort, please stop immediately and see a doctor. Stay safe and happy stretching!