Translated from Sanskrit, Utthita means extended, and Trikona means three angles, i.e., triangle. Therefore, “extended three-angle pose” is the full name of the pose.
Trikonasana in Practice
The pose itself belongs to the group of standing poses. Although it is counted among the basic poses in yoga, it also has variations in case the practitioner cannot do the pose completely. Also, Utthita Trikonasana can be characterized as a balance pose, considering that the eyes are kept open to stay in the same pose. Of course, if the practitioner has a developed sense of balance, he can freely keep his eyes closed.
Trikonasana is practiced in almost all styles of yoga, both static and dynamic. In both cases, this pose can be very challenging, regardless of the fact that it is a basic pose in yoga.
While you are in the pose, if you have coordinated breathing with a directed gaze toward the fingers of the raised arm and activate the whole body in the right way, the pose itself will act as a meditative posture. Especially if your body is completely open for this pose. Which would mean that your hamstrings, back, and stomach muscles are properly engaged.
Pose Entering and Variations
Since it is a standing pose, it activates the legs of the practitioner to a great extent. Getting into the pose involves stepping with the right foot to the side (3 to 4 feet relative to the left leg) and turning the right foot with the toes at 90 degrees. The left foot turns the toes inward at 15 degrees. Both legs are activated, which means the feet are grounded on the yoga mat and the calves and the thighs are engaged.
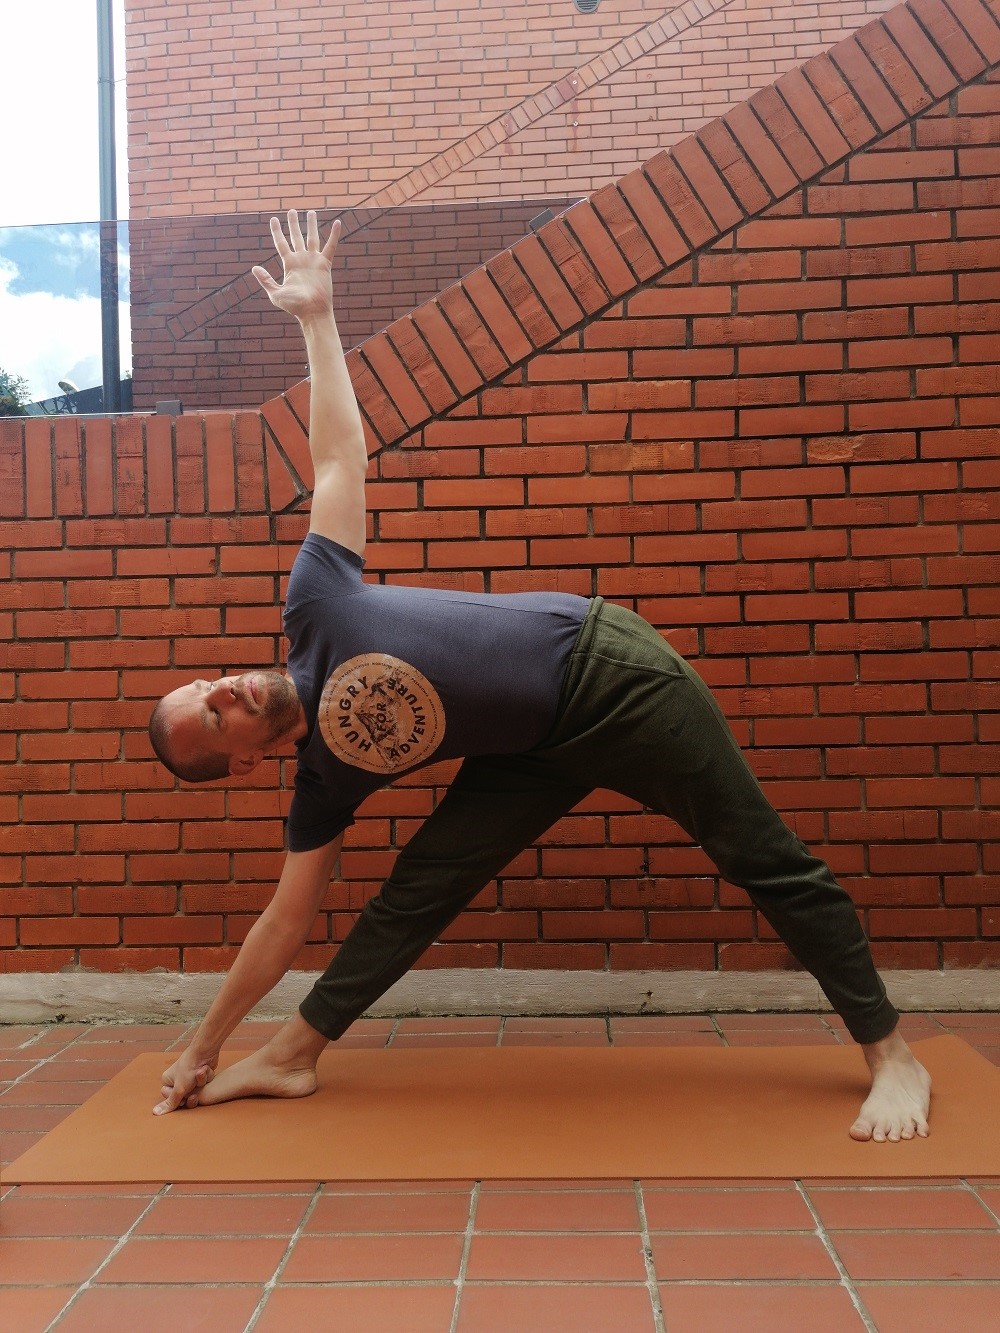
The arms are raised at 90 degrees, and the gaze is directed toward the fingers of the right hand. Inhalation takes place in the pose. With the exhalation, you go down, trying to reach the big toe of the right foot with your right thumb, index finger, and middle finger. That is a complete stance in the lower body.
Of course, if you cannot reach the right thumb, feel free to place your right hand on the calf or thigh of the right leg. No matter where you place your right arm, try to raise your left arm all the way to 90 degrees. The full pose means that both your right and left arms are in the same plane, with a directed gaze toward the fingers of the raised and stretched left arm.
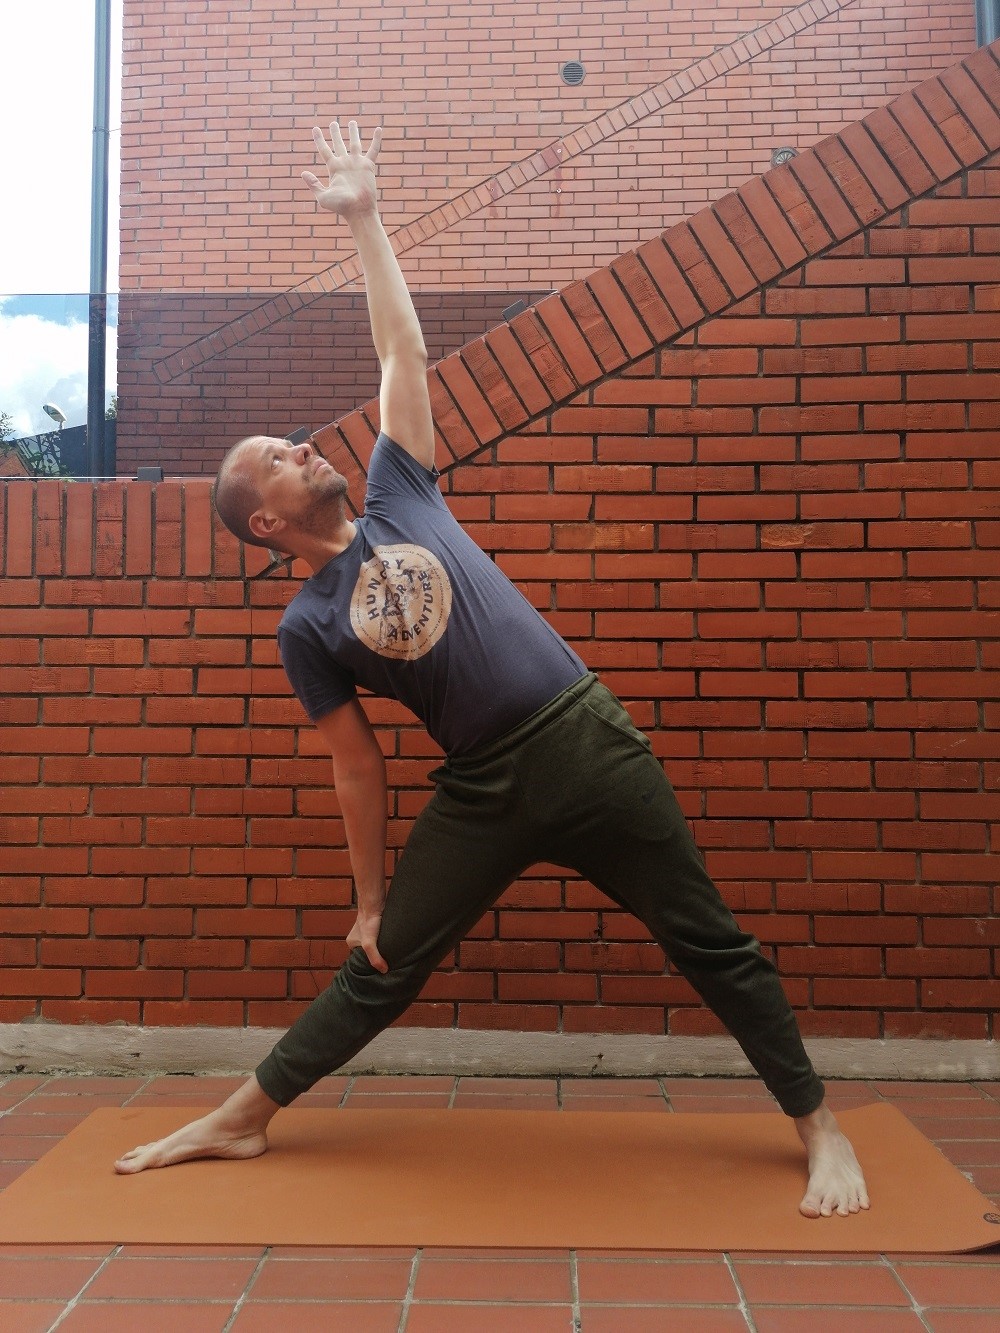
When entering the pose, it is very important to pay attention to the alignment of the upper part of the body in relation to the right leg. You must not allow your upper body to move inward. The goal is to keep your upper body in line with your right leg.
If you cannot reach the toes of the right foot without moving the upper part of the body inward, feel free to use the block as a support for the right hand, i.e., the palm. Choose the block height that suits you. If you need more blocks, feel free to use them. I know from experience that practitioners who are not stretched and do not have open hips need to use two or more blocks at first.
It is more important that you enter the pose so that the upper part of your body is aligned with the right leg; it is less important whether you reach the right foot’s big toe.
This challenge is mostly faced by practitioners who are at the beginning of their yoga practice. Be sure to use a block if you are experiencing this pose for the first time, especially if your hamstrings are not properly stretched. The same applies to the muscles of the back and stomach.
Benefits and Limitations
Spiritually, this pose is excellent for the heart chakra. Accordingly, I highly recommend it to all practitioners who want to work on opening their heart chakra. By working on opening the heart chakra on a spiritual level, you are also working on opening the entire chest on a physical level.
The heart chakra is the fourth chakra, the chakra of self-love and others, forgiveness, compassion, and joy.
The pose itself lengthens the entire spinal column. If you practice this pose often, you can strengthen your upper body and your thighs very quickly. The shoulders, hips, groin, hamstrings, and calves also have fine openings.
If you want to improve your digestion, practice this pose. In Utthita Trikonasana, the organs inside the abdominal cavity are massaged, thereby improving their function and, thereby, improving the digestion process itself.
This pose is recommended for people with bloating, gastritis and heartburn problems.
To benefit from practicing this pose, it is advised to stay in it for at least 30 seconds, not less.
I recommend Trikonasana to people dealing with back pain since the pose gently stretches the entire spinal column and back muscles.
Trikonasana should not be done by practitioners with neck or back injuries. Practioners who have high or low blood pressure or who have diarrhea, and migraines.
Conclusion
Like every pose, this pose and its variations, has poses that are advised to be practiced as preparatory poses.
In the case of Trikonasana, three poses can be practiced as preparatory poses.
Those three poses are: Katichakrasana, Konasana, and Vrikshasana. The first two poses are very simple, and therefore almost all practitioners can do them in their entirety. The third pose, the tree pose, is a bit more demanding. That being said, this pose also has its variations. Accordingly, the practitioner can choose the variation of the tree pose that corresponds to the current readiness of his body.
During the performance of Trikonasana, it is recommended that the eyes are open and that the gaze be directed towards the fingers of the raised arm. However, if the practitioner has developed a good sense of balance, he is free to try to keep his eyes closed. In this way, he develops his balance center even more on the one hand, while on the other hand, he improves his focus and concentration.
Remember that your upper body should be in the same plane as the stepped leg, most practitioners completely forget this alignment after entering Trikonasana.

