Before I start pointing out how, with the help of yoga (yoga therapy), you can solve the problem of heel pain or plantar fasciitis, we will get acquainted with the very definition of plantar fasciitis.
heal pain
Another name for plantar fasciitis is a heel spur. A very common cause of heel pain can be an inflammatory reaction, and later, there can also be damage to the fibers of the plantar sheath.
The location is the calcaneus. It is a pain in the lower part of the heel bone. Plantar fasciitis is a complete or partial rupture of the connective tissue of the foot’s ligaments.
Plantar fasciitis can occur due to long-term micro-damages that lead to the deterioration of the collagen fibers of the fascia on the heel bone. Due to the pain that occurs in the heel, there may be a change in walking patterns.
Some of the causes of plantar fasciitis can be: obesity, wearing inadequate shoes, standing for a long time, and running for long distances, especially if running on concrete.
In addition to these external factors that can influence the occurrence of plantar fasciitis, internal risk factors should also be pointed out. They can be structural, functional, and degenerative.
When it comes to structural risk factors, they mean that a person has flat feet, indented feet, pronation of the feet, or faces femoral anteversion.
In the case of a flat or indented feet, there is an increase in the amount of stress on the plantar fascia, which tends to maintain the normal arch of the foot.
Functional risks include reduced flexibility of the calf muscles and Achilles tendon. Also, the reduced upward mobility of the foot (dorsiflexion of the foot) is considered an operational risk when we talk about the possibility of plantar fasciitis.
Atrophy of the heel fat pad and aging are degenerative risk factors for plantar fasciitis.
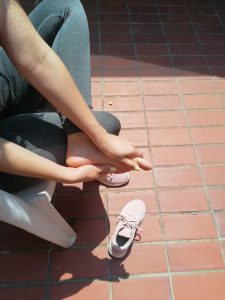
One of the simple ways to determine whether a person suffers from plantar fasciitis is the following test. Sit with your back straight and your legs relaxed. It would be best to sit on a chair with your legs dangling. Bend the foot up. After bending the foot, bend the big toe up; this movement of the big toe will lead to increased pain in the heel if it is plantar fasciitis.
bend big toe
In most cases, the pain in the heel manifests itself in the morning hours. It usually decreases during the day. However, if there is a pronounced load, it can be increased. Sometimes, that pain can also reach the ankle joint. In addition to the sharp pain, plantar fasciitis can also cause swollen and warm feet.
Bear in mind that some groups are more at risk than others when discussing the possibility of plantar fasciitis. These people have a markedly shortened hamstring muscle and flexibility of the Achilles tendon. Also, as I pointed out a little while ago, there are people with flat and indented feet. It should be borne in mind that pain in the heel occurs more often in the female population.
Athletes who, according to their activities, are exposed to a greater risk of plantar fasciitis are basketball players, runners, volleyball players, athletes, soccer players, and handball players.
When this syndrome is diagnosed, it is very important to start treatment on time. First of all, you should do exercises to strengthen the foot muscles. This includes stretching the calves and feet.
exercise to strengthen foot
If one of the causes of pain in the heel is obesity, you should make corrections in your diet. During the rehabilitation process, you should avoid running, especially running uphill. If buying new shoes is necessary, discard the old ones and go shopping.
How Can Yoga Help With This Syndrome?
As before, we move directly from theory to practice.
First Pose
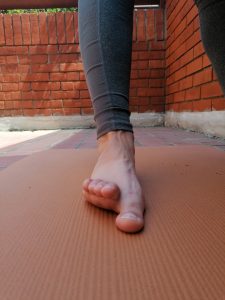
The first pose meant to solve heel pain involves you standing up next to a wall. Step with both feet, then one step back. The feet are facing the wall. After that step, take another step back with your right foot. With your right leg fully straightened, shift your weight to your right heel as you push up the wall with your hands. Stay in the pose for ten inhales and exhales. Then switch legs.
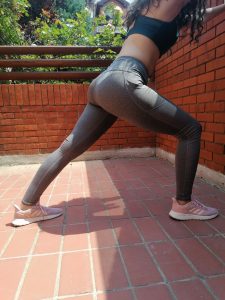
heal stretch
Second Pose
The second pose implies that you step back with both feet again. After that step, step back one step with your right foot. Bend both legs at the knees and push the wall with your hands. You will notice that the stretch is now only happening in the lower part of the calf. Stay in the pose for ten inhales and exhales. Then switch legs.
Third Pose
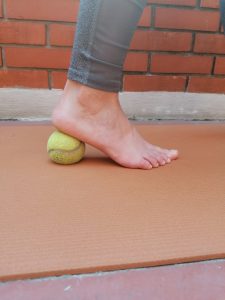
The next pose involves the use of a block. The block will have the role of a low step.
You will use the first block height, the smallest. Take one step your feet back. Place the toes of your right foot on the edge of the block while resting on your right heel. If you don’t feel the stretch, feel free to lean forward slightly. Maintain this position for ten breaths. Then switch feet.
Fourth Pose
The fourth pose puts you on all fours. More precisely, you are resting on the asura with your palms, knees, and toes. You are in the preparatory position for a cat or a cow. Emphasize the toes, feeling the stretch in the soles of the feet. Stay in that pose for ten breaths. After that, slowly move the saddle halves backward until you lower them onto your heels. Straighten your back, and stay in the pose for ten breaths.
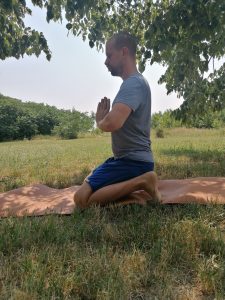
cat cow preparation
Fifth Pose
The fifth pose is a natural continuation of the fourth. Relax the toes slightly and lower the saddle halves onto the heels. From that sitting pose, slowly lift your knees as far as possible. Keep your palms flat on the floor for support if needed. This pose is excellent for stretching the hamstrings. Also, stay in this pose for ten inhales and exhales.
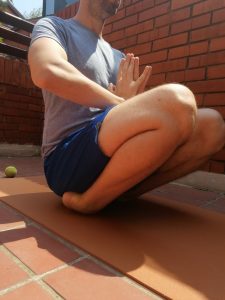
hamstring stretch
Sixth Pose
The sixth pose involves the use of a belt. Lie on the floor with your left leg fully extended. Raise the right leg to ninety degrees. It is important that it is entirely straightened and not bent at the knee. Put the strap around the soles of your feet. Feel the stretch in the entire right leg. Stay in the pose for ten inhales and exhales. Change the leg.
Seventh Pose
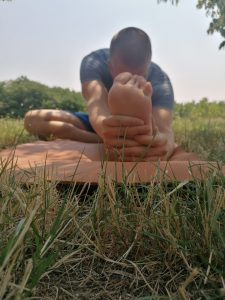
The seventh pose requires you to bend both legs at the knees while lying down and place your feet on the yoga mat. Place your right foot on your left thigh. With both palms on the left knee, pull the left leg as close to the body as possible. Become aware of the stretch in the back of the right leg. Stay in this pose for ten breaths. Change the leg.
Conclusion
This article discussed seven effective yoga poses for Plantar Fasciitis. If you have time in your daily schedule, you can also do downward facing dog, Malasana, chair pose, mountain pose, table pose with s forward bend, and drop toes.
seated yoga pose
Be sure to rest in the Shavasana position at the end. Stay in it for at least 5 minutes.
Namaste.