Yoga is about relaxation and serve as a reminder to channel your energy flow. But your meditation area can get messy if you do not have proper storage space for your mats and other yoga accessories.
After reading this post, you will be able to make your own yoga mat holder using a variety of techniques. These will not only help you create a storage space but also zen up your yoga area.
DIY Yoga Mat Shelf
- Take plain paper and use it as a template in order to create the basic design for your yoga mat holder.
- On this paper, make a half-heart-shaped structure and cut the outline.
- Now, take your wooden board and place this template on the board.
- After this, trace the outline and remove the template from the board.
- You can also tape the template to the wood while outlining to ensure that the paper does not move during the process.
- Using a jigsaw, cut these outlines.
- Now, take three long wooden boards, preferably 40 x 15 inches long, and place your cutouts on the sides of these boards.
- Using wood adhesive glue, place these cutouts. You may also use a driller and screws to ensure that these are attached.
- While the glue dries, clamps will help keep the wood base in place.
- Now, you will have a box-shaped structure, open from one side.
- You may also use a stainer to give a finishing color to the wood.
- Once your wood stain has dried, you may use nails to fix the yoga mat holder to the wall.
- Make sure the fitments are sturdy enough not to let your holder fall down.
DAV Yoga Mat Rack
- In order to build the frame for your yoga mat holder, take the 20-inch side braces and attach eight-and-a-half-inch braces between the longest ones.
- This should now look like a rectangular box with two short legs.
- Attach this frame-like structure using nails or wood glue. This will complete your basic frame.
- Repeat this process in order to have another frame structure.
- Using another wood piece, combine these two frames. Now, you will have an almirah-like structure.
- Mark the inner side of the tabletop this should be about 24 inches x 14 and a half inches,
- Mark the lower side of the shelf. You can do this by putting the table on top and tracing the legs.
- Use a jigsaw to cut them out.
- In order to make the storage shelves, use 1 inch of 3-inch wood and cut eight and a half inches long pieces.
- Trace of a circle ornate of the board, leaving at least 1 inch at the bottom.
- Cut this half circle using a jigsaw.
- You can use sandpaper to smooth the corners.
- Attach these to the inner side of the frame.
- Use wood paint or stain in order to add color to your rack.
- Let it dry, following which you can use your yoga mat holder.
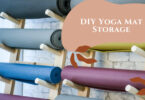
DIY Yoga Mat Rope Shelf
- Construct a shelf of suitable size.
- Mark 4 points (one on each corner), leaving some space from the corners and sides.
- Using a drill, make holes in these marked points.
- Now, take a rope and cut them in equal lengths.
- The preferable size for these groups can be 20 inches each.
- Using glue, secure the ends of these ropes.
- Pass the rope through the holes that you made.
- Make sure that you pass two ends of a rope to one side of the holes only.
- Secure by knotting the end of these ropes.
- This will secure your hanging ropes to your shells.
- Using a drill and screws, hang the shelf to the wall.
- With this, you will be ready to use your yoga mat holder.
DIY Yoga Mat Display Rack
- Take ten wooden pieces, preferably 8×7 inches long.
- Take other pieces of wood 3×7 inches long.
- On each of the long pieces of wood, glue the smaller pieces in such a way the shorter pieces stand on the edge.
- On your choice’s display wall, mark points to determine where your open rack will be placed.
- Make sure that you have marked these points in a pyramid-like structure to add definition to your display rack.
- Using a drill and screws, secure these pieces in their marked positions.
- Before proceeding, you can also paint or stain these wooden structures. This will also protect them from water erosion.
- Once you have secured these wooden pieces in position, your open rack will be ready.
DIY Leather Strap Yoga Mat Holder
- Take too long pieces of leather. To make this organizer, you may also reuse old belts or pieces of cloth.
- Secure the ends of the leather by folding and gluing inwards.
- Once the glue has dried on the leather straps, punch holes.
- These holes will secure the ends of the straps together using rivets.
- Make sure that you leave half to 1 inch of space from one end of the strap.
- After securing the rivets, you will have a loop-like structure.
- Repeat these steps with the other strap.
- Now, on the wall of your choice, mark two points at appropriate distances.
- These points will determine where your straps will be placed on the wall.
- Using a drill and screws, secure straps.
- Make sure that the screw passes through the half to 1-inch free leather that you left above the rivets.
- With this, your yoga mat wall hanging holder will be ready to use.
Conclusion
A yoga mat holder is necessary to manage your mats, protect them, and also make them last longer. These yoga mat holders are easy to make and also affordable. Moreover, you can also add a personalized touch and can customize them according to your interiors.
Ensure that you sand the edges and any fine pieces of wood that might cause an injury or wound you up. Be careful while you use the drill machine for any other sharp object and have a safe journey experience.